Nowadays most of the technical people suffer from PEM file to PPK file generating with a little bit easy to understand.
Login AWS account as per your credentials and click on Instance ( Step 7: Review Instance Launch) than window showing like below image.
Then choose your option whether it existing or creating a key pair.
First, download the PEM file from AWS account whether to create a new key pair or existing key pair.
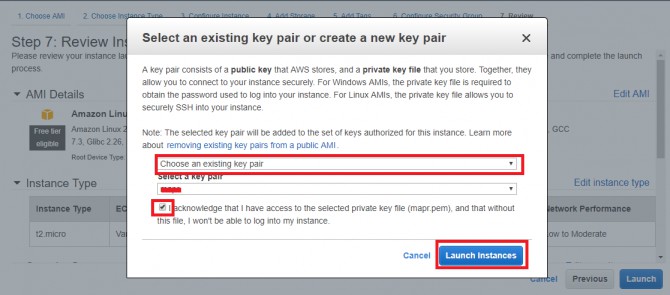
Here choose an existing key pair then give a name for that key pair and acknowledge it.
After that Launch instance machine as per requirement.
Download Putty Key Generator from Putty official website then load the PEM file like below snapshot.
The first load the PEM file then clicks on Generate button.
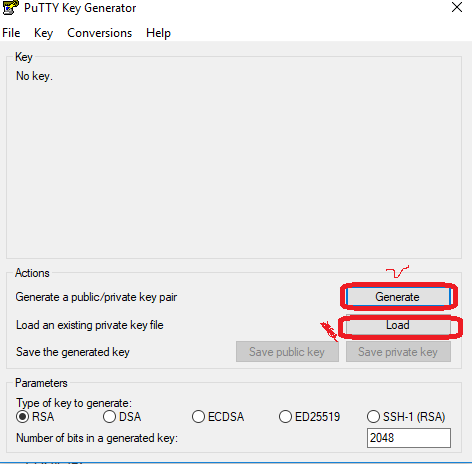
Note: After the generating time some randomness by moving the mouse over the blank area otherwise, it will not generate the PPK file.
Then Save the generate the PPK file as either save private key or save public key.
After generating of PPK file then go with Putty
Note: Putty Generator only used to generate files.
Open Putty then give IP address and Port number as per machine details.
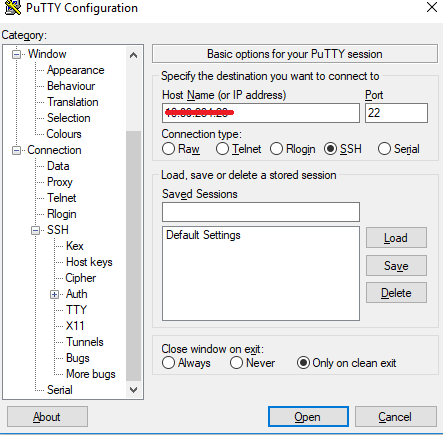
Here will give IPV4 address or completely Hostname ( check with “hostname” command in Linux machine). Don’t give IPV6 address.
Next will go within the category clicks on SSH option -> Auth -> Browse the PPK file for authentication as per below snapshot in Putty.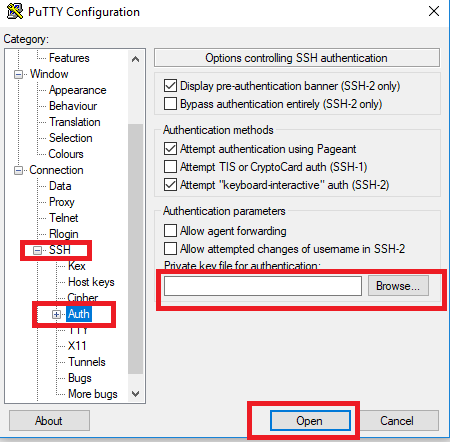
Here SSH means that Secure Shell key management system for the authentication system in the network services.
After selecting the SSH option go with Auth option then will get direct Browse option so simply browse the PPK or PEM file then clicks on Open button.
Finally, open the command prompt ( terminal ) console then will give username after that will get Yes or No option then click on YES option.