Basically, IntelliJ IDEA is a Java-related IDE for developing software developed by JetBrains. Here we discussing how to install Scala plugin in IntelliJ IDEA on the Ubuntu operating system.

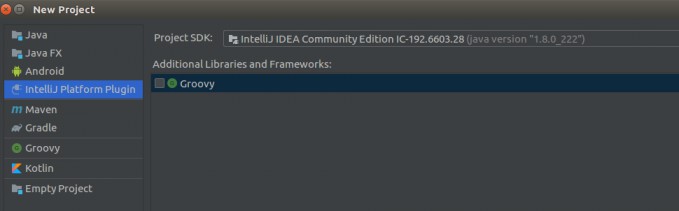
For, first time users in IntelliJ IDEA we checked whether Scala Plugin is available or not. But here is Scala is not available.
Install Scala plugin in IntelliJ IDEA:
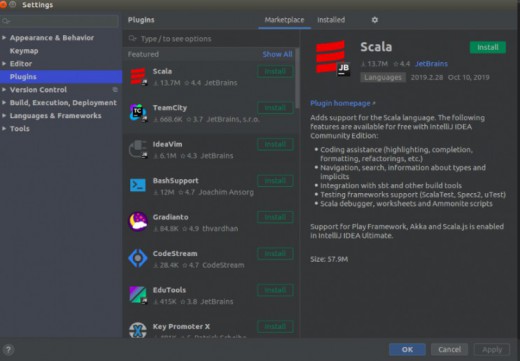
Step 1: Go to the Menu bar on top of the IDEA “File” -> “Settings”
Step 2: Click on “Plugins” then search Scala, it will be showing like “Scala Install”. Click on the Install button and then click on “OK” at the bottom.
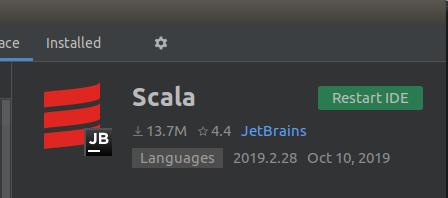
Step 3: After successfully installed the Scala plugin then “Restart IDE”. Then we get the notification “IDE and Plugin Updates”, Restart it.
Step 4: After Restarted IntelliJ IDEA then click on “New Project” it showing programming languages including Scala also.
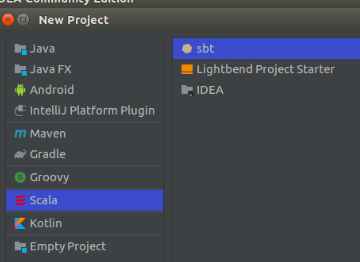
Step 5: Choose Scala and Sbt then click on the “Next” button on the bottom of the IntelliJ IDEA.
Step 6: Change your Project Name and Location as per your compatibility. Check your JDK version, Sbt version, and Scala version then click on the “Finish” button.
Getting Scala version for Sbt, downloading Maven Repos from scala official website then it showing [SUCCESSFUL] in IntelliJ IDEA console. It will take some more time to set up the Scala project structure and get external library files for Java, Scala from the internet.
IntelliJ IDEA default programming languages and its libraries in below:
Java
Groovy
Android
Kotlin
Maven,etc
If you need any programming language like Scala, Python, and etc just add a plugin like the above steps then simply will get the plugin on IntelliJ IDEA.
Note: IntelliJ IDEA one of the best IDE for developing code in Java, Scala, Python, etc.
Nowadays technology is day by day updated to simplify the time complexity, optimization, etc.
So need to update the programming language in IDEs using related plugins like the above steps.