In this article, we will explain how to the installation of Active Directory (AD) in Amazon Web Services(AWS) with step by step process.
First, I am going to AWS services:
Step 1: Goto EC2 services.

Step2: Launch instances.

Step3: Configure Instance Details, I gave only one instance, if you want more then launch it simply.

Step4: Here, selected Windows server 2012 – R2

Step5: After that launch the instance, then click on the “Connect” button.

Step6: Click on “Get Password”, using your pen file, you downloaded earlier

Step6: After that click on “Decrypt Password”, and save it somewhere

After the configuration is done then “Download Remote Desktop File”. Open the RDP file.
Step 7: Give your Decrypt password.

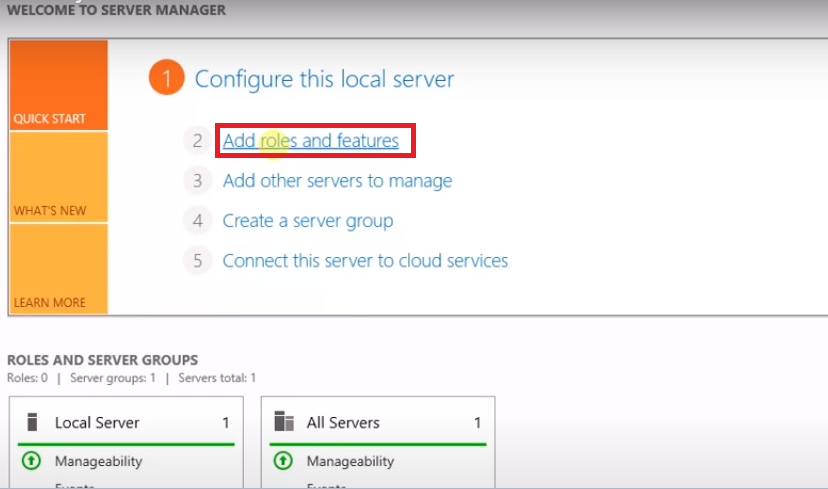
Step 8: Open Server Manager in the bottom taskbar.

Step 9: Click on “Add roles and features”
Step 10: Click on the “Next” button.

Step11: Here you choose “Installation Type ” and then “Role-based or feature Installation”. After that click on the “Next” button.

Step 12: Please select the server, normally it is the default option. In case do you want another server then select it?

Step 13: In this step select “Active Directory Domain Services” and then click on the “Next” button.

Step 14: Here we add “Add Features”, including management tools.

Step 15: Click on “Install”, then restart automatically, after a click on Yes option.

Step 16: Click on “Restart the destination server automatically if required” option after that “Install” it.

Step 17:Step 17: Click on AD configuration wizard the select “Add a new forest” and give Root domain name than “Next”

Step 18: Here we give Restore Mode password and then click on the Next button.

Step 19: Goto Paths and check whether correct paths or not after that click on the “Next” button.

Step 20: Prerequisites check then click on the “Install” button.

step 21: Here Automatically will get the AD CS Configuration window, click on the Next button.

Step 22: Select Role Services to configure, give default configuration.

Step 23: Click on configuration will get the completed window.

Step 24: Congratulations, getting “Configuration succeeded”.

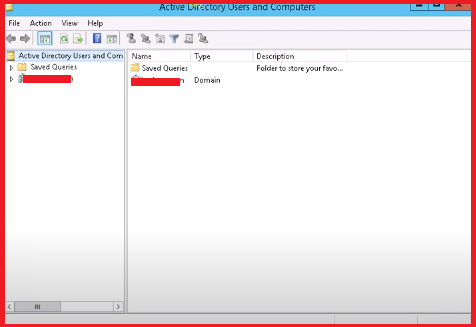
Step 25: Open Active Directory will get like below and then check your domain name.